
This guide tells about how to plan a Complete Hardscaping Project from Start to Finish. With proper planning, a simple hardscaping project can make an ordinary backyard into an effective and aesthetically pleasing outdoor living area that can improve the value of your home. However, hardscaping is not as easy as selecting pavers and hiring a crew of people. This includes site assessment, design considerations, material selection, permitting process, and construction sequencing. Before breaking ground, you should make yourself familiar with the entire outdoor build process patio in order to save time, cash and frustration, whether you’re dreaming of a stone patio, a retaining wall, a walkway or an entire outdoor kitchen.
This guide walks through every stage of hardscaping planning, with a specific focus on considerations relevant to patio construction NY homeowners should keep in mind given the region’s climate and soil conditions.
What Is Hardscaping, Exactly?
Hardscaping, Hardscape is the structural, non-living components of a landscape design, such as patios, walkways, retaining walls, fire pits, outdoor kitchens, driveways and pergolas. Unlike “softscaping” (plants, lawns, trees and other living features). A full outdoor living space typically incorporates both, but generally, the hardscaping elements are the backbone and framework that the rest of the space is designed around.
Hardscaping is more time-consuming than planting a garden bed because it takes more thought up front, including consideration of hardscaping permanent structures, excavation, and drainage. If you fail to plan properly, such as allowing for poor drainage or insufficient base, cracks, shifting or problems with water pooling can occur in just a few years.
Step 1: Define Your Goals and Vision
Before you start drawing in lines and calling in the contractor, make sure you understand what you are really looking for in your outdoor area. Ask yourself:
- How do I plan to use this space? Entertaining, quiet relaxation, dining, cooking, or a mix?
- How many people will typically use the space at once?
- Do I want a single feature (like a patio) or a multi-zone design (patio plus fire pit plus walkway)?
- What’s my long-term vision for the property, and does this project fit within it?
- What style am I drawn to modern, rustic, formal, or naturalistic?
It can be useful for many homeowners to make a short list of their desires and prioritize them. This is extremely helpful later on when money is limited and one always has to make choices as to whether or not something is being added to the production in the current year or going in at a later date.
Step 2: Assess Your Site
The key to any hardscaping success is a comprehensive site assessment. It is a step that is often overlooked, but it will directly influence the materials, drainage solutions and structural reinforcements you require for your project.
Evaluate the Terrain
Does your yard slope have a flat or uneven surface? Sloped sites may need retaining walls, terracing or additional excavation to provide a level site for a patio or walkway. A flat site is typically simpler, but requires appropriate grading to keep water away from your home’s foundation.
Check Soil Conditions
The composition of the soil will influence, over time the settling of a hardscape. Clay-rich soils have more holding power but can swell and shrink due to seasonal temperature fluctuations; sandy soils have poor holding power but may need more compaction. A larger project could warrant a soil assessment in much of New York, as the soil can change considerably even among properties.
Consider Drainage
Bad drainage is among the top reasons for hardscape failures. Excessive watering on a patio or under a retaining wall can lead to heaving, cracking and erosion. A drainage plan is always a part of effective hardscaping planning. It could be a natural drainage plan with permeable pavers or a grade to direct water away from the area, or a French drain.
Account for New York’s Climate
In the case of patio construction NY projects specifically, it is an important factor to take into account. In winter, water that accumulates under a patio or walkway can freeze and expand, cracking or heaving the pavers or concrete. That is why base depth and compaction is important to this area; it is a place where it can be easy to cut corners in installation and end up with a project needing to be redone in a few winters. The depth of the base that may work in a warmer climate may not be adequate for a Northeast winter.
Step 3: Make an Affordable Budget
The amount of money that you have to invest in hardscaping all depends on the materials you use, the square footage you need, the complexity of your project and how much labor it requires in your region. It’s worthwhile to have an idea of where the money is going before you decide on a design:
- Materials: Pavers, natural stone, concrete, gravel, and specialty features like fire pits or outdoor kitchens all carry different price points.
- Excavation and grading: Sites with slopes, poor drainage, or extensive existing landscaping to remove will cost more to prepare.
- Base materials: A proper gravel base and compaction are non-negotiable for durability, especially in freeze-thaw climates, and this is not an area to cut costs.
- Labor: Skilled hardscape installation is labor-intensive, and experienced crews often charge more but deliver work that lasts significantly longer.
- Permits: Many municipalities require permits for structures like retaining walls over a certain height or any project that affects drainage patterns.
- Contingency: Set aside 10-20% of your budget for unexpected issues, such as discovering poor soil conditions or underground utilities once excavation begins
One of the best methods to gauge what your budget should be is to get multiple quotes from licensed contractors. Don’t be impressed by quotes that are much lower than the others because they may mean that the base has not been prepared as well as it should have been, or that the material is not as good as it should be, and will cause later issues.
Step 4: Choose Your Materials
The selection of materials can have an impact on the aesthetics and durability of your hardscape.
Common options include:
- Concrete pavers: Affordable, durable, and available in a wide range of colors and patterns. A popular choice for driveways, patios, and walkways.
- Natural stone: Includes flagstone, bluestone, and granite. Offers a high-end, organic look but typically costs more than concrete pavers.
- Poured concrete: Cost-effective for large areas but more prone to cracking over time, particularly in freeze-thaw climates, unless properly reinforced and jointed.
- Brick: A classic look that pairs well with traditional home architecture, though it can be more susceptible to shifting if not installed with a solid base.
- Gravel or crushed stone: Budget-friendly and good for informal pathways, though less ideal for high-traffic patio areas or spaces needing furniture stability.
Consider materials beyond the cost of the materials. Take into account maintenance, freeze-thaw resistance and ability to coordinate with your current exterior and future landscaping.
Step 5: Finalize the Design
Once you’ve considered goals, site, budget and materials, you can start to settle on a design. This is where many homeowners decide to collaborate with a landscape designer or hardscape contractor who will develop a detailed plan that may include:
- Drawings to scale with dimensions and layout (plan)
- Material specifications
- Soil maps and soil surveys
- Lighting & electrical – as applicable
- Plant integration points, if softscaping will be added later
A documented design also provides a reference throughout the building process, keeping it on track and making it easier to identify discrepancies before they become costly issues.
Step 6: Secure Permits and Utility Marking
Depending on the extent of your project and your municipality, permits may be required before construction. This is particularly prevalent when used by:
- Retaining walls above a certain height (often 4 feet, though this varies by jurisdiction)
- Structures that affect stormwater drainage
- Projects near property lines or easements
- Electrical or gas lines for outdoor kitchens or fire features
Always call your local utility marking service (in New York, this is usually through 811) before any excavation begins to mark all utility lines. Failure to do this can result in expensive damage to gas, electric or water lines, as well as dangerous conditions.
Step 7: Prepare the Site
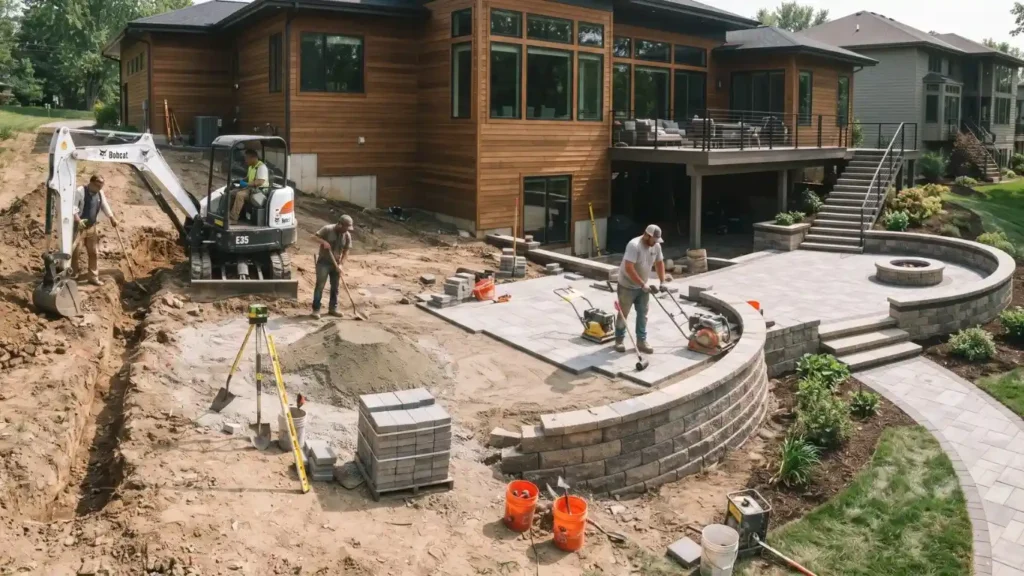
Site preparation is the groundwork in more than one way for the outdoor build process. There are usually the following steps during this phase:
- Clearing area: clearance of established vegetation, old hardscapes or debris within the area.
- Excavation: Excavating to the appropriate depth according to design and climate needs. In climates with extreme temperatures, like those in New York, excavation is sometimes deeper than in warmer areas in order to provide enough depth below the ground to withstand freeze-thaw.
- Grading: Shaping the sub-base to ensure proper slope for drainage, typically directing water away from structures at a slight, consistent grade.
- Base installation: Building and compacting of crushed stone or gravel base. This is an essential step in the long-term stability and is one place where low-quality installations skimp.
The number one most frequent cause of premature hardscape failures is poor site preparation or haste in site preparation. The correct or incorrect preparation of the base may appear the same on installation day, but within one year or two, it will become obvious that there are problems with the base if it was improperly prepared.
Step 8: Install the Hardscape
The base is ready and the process of installation can start. This step can involve the following:
- Installing and smoothing pavers or stones.
- The pouring and finishing of concrete.
- Proper backfill and drainage of the retaining walls
- Adding edge restraints to prevent pavers from moving with the seasons.
- Application of Polymeric Sand/Mortar Joints (Depending on the material)
Quality control is important in the entire installation process. Regular checking of pavers for level and alignment, and testing of any drainage features, should be done before the project is deemed complete.
Step 9: Add Finishing Touches
After you’ve installed the basic hardscape, the finishing details add character to the space:
- The outdoor lighting is installed for safety and ambiance.
- Furniture, umbrellas, pergolas, or shade structures in general.
- Use fire pits or fireplaces to create a focal point.
- Elements of the garden that are not hard elements but instead include soft elements such as planters, garden beds or lawn areas around the hard element.
- Sealant application (where applicable for the material) to prevent staining/weathering
Step 10: Plan for Long-Term Maintenance
A hardscape is a long-term investment and will last a long time if properly maintained. There are some general maintenance concerns:
- Resealing pavers or concrete every few years, depending on the material and manufacturer recommendations
- Reapplying polymeric sand in paver joints as needed
- Monitoring for any settling or shifting, especially after harsh winters
- Cleaning to prevent moss, algae, or staining buildup
- Inspecting drainage systems periodically to ensure they remain clear and functional
When you’re thinking about renovating your roof, it’s a good idea to speak with your contractor before the job is finished, so you understand what you can expect and how you can safeguard your investment for many years to come.
Final Thoughts
The process of planning a comprehensive hardscaping project is multi-faceted and can be time-consuming, but with patience and attention to detail, it can be rewarding. Whether it’s establishing your vision and considering your site, budgeting, material selection, permitting, and proper installation, each step follows the next. Proper base preparation and drainage planning in the region is particularly important when undertaking a patio construction NY project; skirting the rules on this point is almost inevitable to result in expensive repairs later.
Working with an experienced hardscape contractor who understands the full outdoor build process, from initial site assessment through long-term maintenance, can help ensure your project is both beautiful and built to last. With thoughtful hardscaping planning from day one, you’ll end up with an outdoor space that enhances your property for decades, not just until the first hard winter.
Frequently Asked Questions
1. How long does a typical hardscaping project take from planning to completion?
The timeline will depend on your project, but in the typical case of design, permitting, material lead time and construction, a few weeks to a couple of months should be allocated for your homeowner. The larger or multi-feature projects may take longer, particularly when permits and/or utility work are required.
2. Do I need a permit for a patio or walkway in New York?
This will depend on your municipality and the size of the project. Some patios at ground level may not need permits, while retaining walls over a certain height may require them or projects changing drainage patterns or work that is close to property lines may require permits. Obtain a building permit before starting work.
3. What’s the best base depth for a patio in New York’s climate?
New York projects generally need thicker beds of compacted gravel than projects located in other regions of the country, due to the freeze-thaw conditions of the region. Your contractor should take into consideration local frost depth requirements and design the base accordingly.
4. How much does hardscaping typically cost per square foot?
Price ranges on natural stone can be quite different from those of concrete pavers or poured concrete, depending on the material selected, the complexity of the site and the cost of labor. The best way to get a good idea of realistic prices for your project is to obtain a few quotes from licensed local companies.
5. Can I install pavers or a patio myself, or should I hire a contractor?
The installation of a stepping stone path is a simple project that can be done by yourself, while a patio or retaining wall, or anything that has to do with drainage or grading is a great project for a professional to do because they know what they are doing and the most common reason for failure is improperly setting the base.
6. How do I prevent water from pooling on my new patio?
The crucial point is to grade the yard correctly when preparing the site, often to slope away from the patio and the home’s foundation. In areas of greater water flow, permeable pavement or additional drainage systems such as French drains may be used.
7. What’s the difference between concrete pavers and poured concrete for a patio?
Poured concrete are individual units that allow for some movement caused by the ground, and are more easily repaired if damaged, whereas poured concrete is a continuous slab that is more susceptible to visible cracking over time, particularly in freeze-thaw climates, unless reinforced.
8. When is the best time of year to start a hardscaping project in New York?
The best time of year is during the spring and summer months, when enough time is available to do excavation, base work and installation before winter weather arrives. Late installation exposes recently installed work to freeze-thaw cycles, which can cause a risk of damage.
9. How often does a hardscape need maintenance?
The maintenance requirements are dependent upon the material used, but as a general rule, the pavers should be resealed every few years, polymeric sand should be periodically added to the joints between pavers, and drainage systems should be periodically checked for maintenance.
10. What’s the biggest mistake homeowners make when planning a hardscaping project?
The most frequent and expensive error is underestimating the significance of site preparation and drainage. Whether a base is properly installed or not, the results can appear identical on the day of installation, and problems such as cracking, shifting or pooling will often manifest within a year or two.


