
The blog tells about Sod Installation Tips for Instant Green Lawns in New York. There’s nothing quite like the transformation sod brings to a yard. One day you’re staring at bare dirt or a patchy, weed-riddled lawn, and the next, you’ve got a lush, uniform carpet of green. For homeowners across New York looking for an instant lawn NY weather and soil conditions can actually support, sod is often the fastest and most reliable route to get there, as long as it’s installed correctly.
This article provides readers with practical tips on how to lay sod for the best results, whilst providing New Yorkers with everything they need to know about timing and soil preparation.
Why Choose Sod Over Seed
While seeding is the cheaper option, sod can be invaluable, with its efficient and beautiful ability to suppress weeds. Sod is especially practical for homeowners with a short growing season, such as those in New York, where the soil is often stripped away, but one still needs a lawn to look nice, for instance, in preparation for an event, sale, or summer enjoyment. Nevertheless, using sod means taking care of the installation process and the few weeks of maintenance that follow in order for this gorgeous carpet to become part of the landscape permanently rather than being wasted.
Sod provides benefits beyond its quick use. Since it consists of a heavy mat made of roots and grass, it prevents erosion on slopes and supports the land in ways that seeds cannot accomplish in their early phase. It also takes care of the weed seeds since there is no exposed land that could be utilized by the weeds for their growth. Thus, for those families who can’t wait for their children and pets to play in the yard, they wouldn’t have to wait long for their lawn to grow.
Best Time to Install Sod in New York
Timing plays an important role in the series of circumstances, which affect how successful an instant lawn NY can actually be in the long run. Overall, New York’s growing season makes early fall (from September to early October) the best time to install sod, followed by late spring (from mid-May to early June).
- Fall installation benefits from mild weather, increased precipitation, reduced competition due to weeds, and allows the roots to have enough time to strengthen before the winter dormancy period.
- Spring installation is also effective, though it calls for more careful watering when the temperatures climb towards summer.
- Summer installation is possible, but it has its drawbacks, as the area suffers from heat stress and inconsistent watering that may make it hard for sod to get established.
- Winter installation should be generally avoided, as the roots won’t be able to penetrate icy ground and settle.
It is also important to know the frost dates for your area, since the Upstate area and the North Country have far shorter growing periods.
It’s equally important to keep in mind the frost dates of your location because, for example, Upstate New York has a distinctively shorter growing period as compared to that of the New York City metro area or Long Island.
You should try to work your project around the local sod farm’s harvesting schedule, as sod is a perishable living product that is harvested to order rather than being kept in storage. Therefore, when ordering sod in spring or fall, it is best to do it about a week or two in advance in order to ensure availability.
Preparing the Soil Before Turf Laying
Proper soil prep is perhaps the most important factor in laying a successful turf. Neglecting or hurrying this process is the main reason that sod does not take root, even if the sod brought is in good condition at the time of installation. It is very easy to think that we can skip to the fun bit of laying down fresh sod, but the boring procedures done before laying can determine if the lawn will survive after a year.
1. Prepare The Site Properly
Remove any grass, weeds, rocks, and any other debris from the area to be cleared. Any leftover organic matter in the subsoil can decay and create voids or slips in the soil under the new sod.
2. Test and Amend the Soil
A simple soil test (offered at many local garden centers or Cornell Cooperative Extension offices in New York) reveals the pH and nutrient content of your soil. Most turf grass varieties grow best with a pH of 6.0 to 7.0. If your soil’s pH is out of this range, adding lime (to elevate pH) or sulfur (to lower it) will help.
3. Grade the Soil
You need to grade the soil properly to ensure that it has a slight slope (1-2%) away from the wall of your house. This will prevent water from accumulating and damaging the roots or making the basement damp.
4. Till and Loosen the Soil
Before planting sod, it is necessary to till the top 4-6 inches of soil to break up compacted soil. Once that has been done, the area can be raked flat.
5. Add Topsoil or Compost
Applying a layer of topsoil or compost that is 1-2 inches deep on top of the tilled area allows new sod roots to absorb nutrients from the soil so that they can grow.
Step-by-Step Sod Installation Tips
The following sod installation tips can help you achieve a pleasant, high-quality result once your soil is ready for the sod:
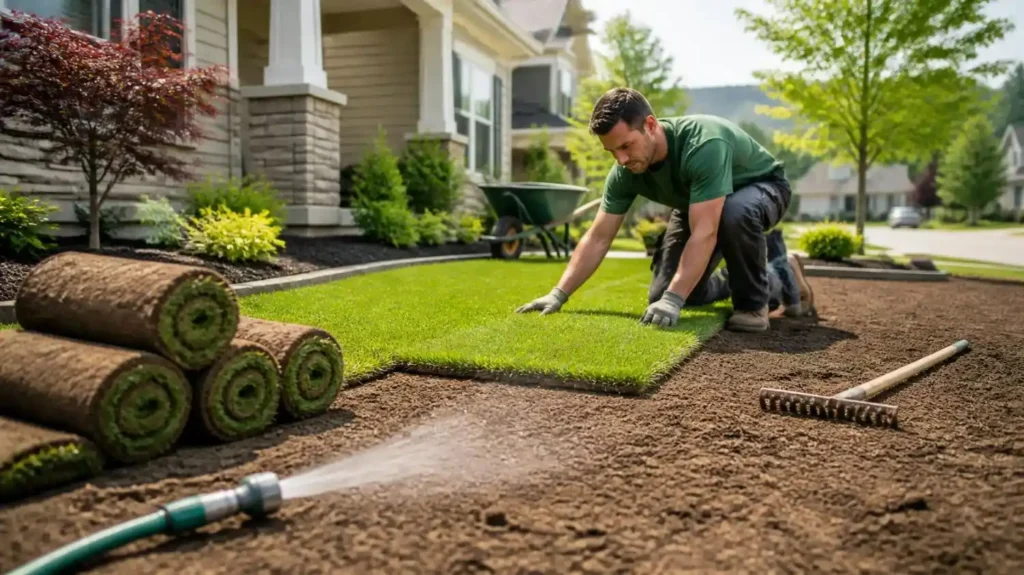
- Make sure to order your sod fresh and lay it immediately upon arrival. As sod is a living entity, rolled sod will start heating up, turning yellow, and developing mold in about 24 to 48 hours if it is kept stacked on a pallet, especially if the weather is warm outside.
- Begin sod installation with straight edges, e.g., beside a driveway or sidewalk; this will help to install the sod straight.
- Lay sod in a brick-like fashion, making sure that the seams do not align from row to row. This technique reduces the risks of potential gaps where edges might become dry and makes seams invisible.
- Push the pieces of sod tightly together without overlaps; avoid leaving gaps in between them too much, as they can turn dry and act as passages for weeds.
- Cut the pieces with a sharp knife or sod cutter around curves, trees, or flowerbeds for a nice finish.
- After laying, use a roller to press the sod. This is an element that is often ignored. But rolling makes a big difference in root establishment speed.
- Make sure to water it right after you finish each section of sod installation; then thoroughly wet the entire area within 30 minutes after the installation process is complete.
Watering Your New Sod: The Critical First Weeks
Water is the aspect that can either make or break a DIY sod installation project for many homeowners. Since there is no root system yet in the new sod, it has to depend on surface moisture for weeks.
- First week: water every day to maintain wet soil under the sod (not soggy) about 2-3 inches under the surface.
- Second week: start watering less often, but allow more water during each watering session.
- Weeks 3-4: switch to the normal watering system (around 1-1.5 inches of water per week).
One easy method for checking whether the sod has rooted is to gently tug on one end of the sod about two weeks after installation. If it resists being lifted, then the roots are taking hold; if it lifts easily, then regular watering should continue.
The weather will impact the schedule, so it is beneficial to modify it when necessary rather than watering on autopilot. A few rainy days could mean that skipping a watering is possible, while an unusually hot, dry spell might require watering as usual in the afternoon to keep the sod healthy. Watering in the early morning is usually best, as this will reduce evaporation and allow the grass to dry before the evening, minimizing the potential for fungus.
Mowing and Fertilizing New Sod
It is critical to be patient when mowing newly laid sod. You should wait for the grass to be around 3-3.5 inches tall before the first mowing, which is done approximately two to three weeks after laying the sod. If you mow before, you may risk damaging the roots, which have not yet been fixed in the ground.
The following guidelines should be adhered to when mowing:
- Make sure that the blades are sharp to avoid the grass ripping
- Never cut more than one-third of the grass blades in one mowing
- Avoid mowing when the grass is wet to prevent soil compaction and the spread of diseases
You can start fertilizing only after the new lawn has been mowed once or twice. Starter fertilizers, as they are rich in phosphorus, are excellent for developing roots, while regular fertilizers can be applied when the lawn is well established, which takes around six to eight weeks.
Common Sod Installation Mistakes to Avoid
Even homeowners with the best of intentions can make serious mistakes. These include:
- Putting down sod on poorly prepared soil, which will cause uneven settling and poor root growth
- Not watering new sod enough, as it dries out much faster than established grass
- Laying sod during excessively hot weather without any preparation for watering it
- Not developing proper drainage before starting the installation process results in aquatic patches and dead grass
- Walking on, or putting heavy things on new sod too soon following installation, creates soil compaction and strains the roots
- Picking grass varieties that don’t match the weather in New York or the amount of sun and/or shade available in the area
Another issue that people might forget about is improper sprinkling and irrigation of the area before installation day. If some parts of the yard remain without proper watering from the sprinkling system, those specific places will have difficulties establishing plugs, irrespective of how well they were laid.
Choosing the Right Sod Variety for New York Lawns
New York features a wide variety of climates, from Long Island’s mild seaside climate to the snowy winter climate of the Upstate. Selecting the right type of grass that fits the climate conditions of your part of New York and your property is an important factor in ensuring successful lawn growth.
- Kentucky Bluegrass is one of the most popular grasses used throughout many regions of New York due to its ability to endure cold temperatures, good color, and self-repair ability in case of slight damage.
- Tall Fescue is a good option for dry lawns, as this type of grass is resistant to drought.
- Perennial Ryegrass grows quite quickly; thus, it is used together with bluegrass types of grass for quick landscaping.
- Fine Fescue is also a worthy alternative for my backyard, as this type of grass is often planted around the trees in shady areas where other types of grass would not grow.
Some sod farms in New York State offer different mixed varieties that are designed to provide maximum advantage in keeping with the climatic conditions in the region. When in doubt, consult the local sod dealer as to which mixture works best in the county, since even neighbouring towns can show considerable variations in the amounts of rainfall, soil characteristics, and rigors of winter experienced by a particular grass type.
DIY Turf Laying vs. Hiring a Professional
Turf laying is a job that many homes can accomplish on their own and may be especially doable for smaller lawns; however, larger lawns or those that have tricky grading might be better off using professional help. These professionals have access to equipment for grading and rolling sod, excellent relationships with sod farms to supply fresher products, and an understanding of various soil and drainage issues.
Homeowners who are weighing whether they can complete the project on their own should take into account several factors, including the size of the area, the difficulty of the land involved, their physical capabilities in carrying heavy rolls of sod (some weighing as much as 40 pounds), and the deadline of the project.
The expense is yet another factor worth considering. Although doing it yourself negates labor costs, doing it by yourself means renting or purchasing a sod cutter, lawn roller, and other equipment, as well as preparing and grading the soil beforehand. If you have a small front yard, doing it yourself could save you money; however, if you have a large or sloping yard, the risk of costly mistakes will likely outweigh the advantages of hiring professionals for landscaping work.
Final Thoughts
Creating an instant lawn NY can be accomplished with a few key steps, such as timing, soil preparation, successful installation, and proper watering in the first few weeks. It does not matter whether you decide to lay down sod on your own or ask for help.
Frequently Asked Questions
1. How much does sod installation typically cost in New York?
The price of sod will differ depending on the square footage, type of grass, and whether you choose the DIY method or hire professionals. But usually sod will cost you more than seeds since you will pay for the materials and labor already when you buy sod.
2. How soon can I walk on new sod?
It is advisable to refrain from walking on new sod for two weeks and then still limit the foot traffic until the roots develop fully, which may take about three to four weeks.
3. Can sod be installed over an existing lawn?
Unlike existing grass and weeds, new grass needs to be removed before the new sod can be laid down. This is because laying turf directly over existing grass hinders correct root/soil contact and ultimately leads to problems with establishment.
4. How much water does new sod need each day?
New sod must be watered each day sufficiently to keep the top few inches of soil moist at all times. However, how much water will depend on other local factors like temperature, sunlight, and the type of soil.
5. What’s the best grass type for shady yards in New York?
Fine fescue types are usually more successful in shaded spots, as they handle less light better than other grass types, such as Kentucky bluegrass, which thrives in sunlight.
6. How long does it take for sod to root into the ground?
Initial rooting will usually start within 10-14 days, with complete establishment taking several weeks to months, based on the season and how the sod is treated.
7. Can I install sod in the summer in New York?
Installation during summer is possible although it is generally more risky due to the heat. In addition to that, lawn owners must adhere to strict watering schedules to ensure that their sod does not dry out before it roots.
8. Do I need to fertilize new sod right away?
Giving the time for roots to settle is usually advisable before applying any fertilizer, ideally after one or two mowings.
9. How do I know if my new sod isn’t rooting properly?
Patches of yellow grass or sod that easily lift when pulled could indicate underlying rooting issues, which may be related to either watering issues or soil compaction problems.
10. Is it better to seed or sod a New York lawn?
Sod is advantageous for creating a lawn that can resist weeds immediately and serves well for erosion control. Seeding, on the other hand, may be cheaper but needs a lot of patience and leaves the seeds exposed to weeds and the weather.


